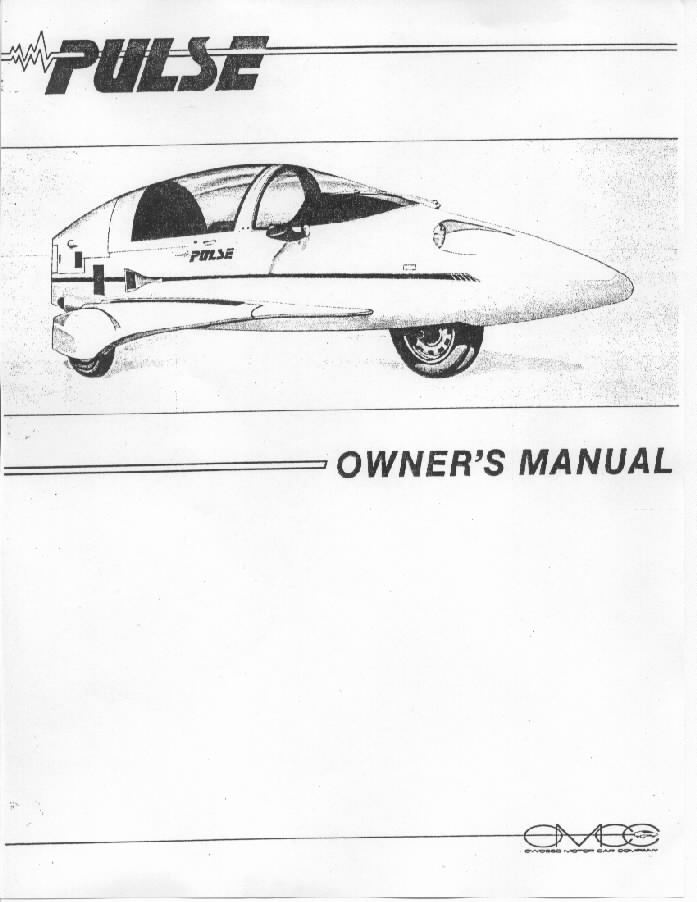
LITESTAR - PULSE MANUAL
Lets keep'em Pretty
Lets keep'em Pretty
As you know the "FACTORY" shut down in 1990, so the only information regarding this unique vehicle is HERE.
We urge you to read the LITESTAR....PULSE manual below in order to assure the most enjoyable, safe and trouble free operation of your motorcycle. If you have any questions regarding the operation or maintenance of your motorcycle, please consult the website and Litestar - Pulse Facebook Page.
If you have questions regarding the powerplant of your Pulse, please pick-up a copy of the engine service manual.
Or consult a motorcycle shop for service.
Before driving your Pulse, become thoroughly familiar with all operating controls and their function.
NOTE: This is an enclosed MOTORCYCLE.
The factory claims that it had been tested under the Federal Motor Vehicle Safety Standard applying to motorcycles. Motorcycle laws for your state apply to this vehicle. In some states, special laws have been passed allowing you to operate the vehicle without a helmet if your seatbelt is fastened. There is a roll bar at the top of the windshield.
Check with your local police to determine what laws apply in your state.
This manual should only be considered a guide in regards to operation.
Please print off a copy of this Manual and keep in your Pulse.
When you sell your Pulse, please pass this manual along to provide the next owner with important operating, safety and maintenance information.
A WARNING or CAUTION notation indicates special procedures that must be followed to avoid damage to the motorcycle, injury to a motorcycle operator, or person inspecting or repairing this vehicle.
INTRODUCTION (CONTROL AND SAFETY SYMBOLS)
BEFORE DRIVING YOUR MOTORCYCLE
INSTRUMENT PANEL AND CONTROLS
STARTING AND OPERATING
MAINTENANCE AND MINOR REPAIR
APPEARANCE CARE
SPECIFICATIONS AND PARTS INFORMATION
SERVICE STATION INFORMATION
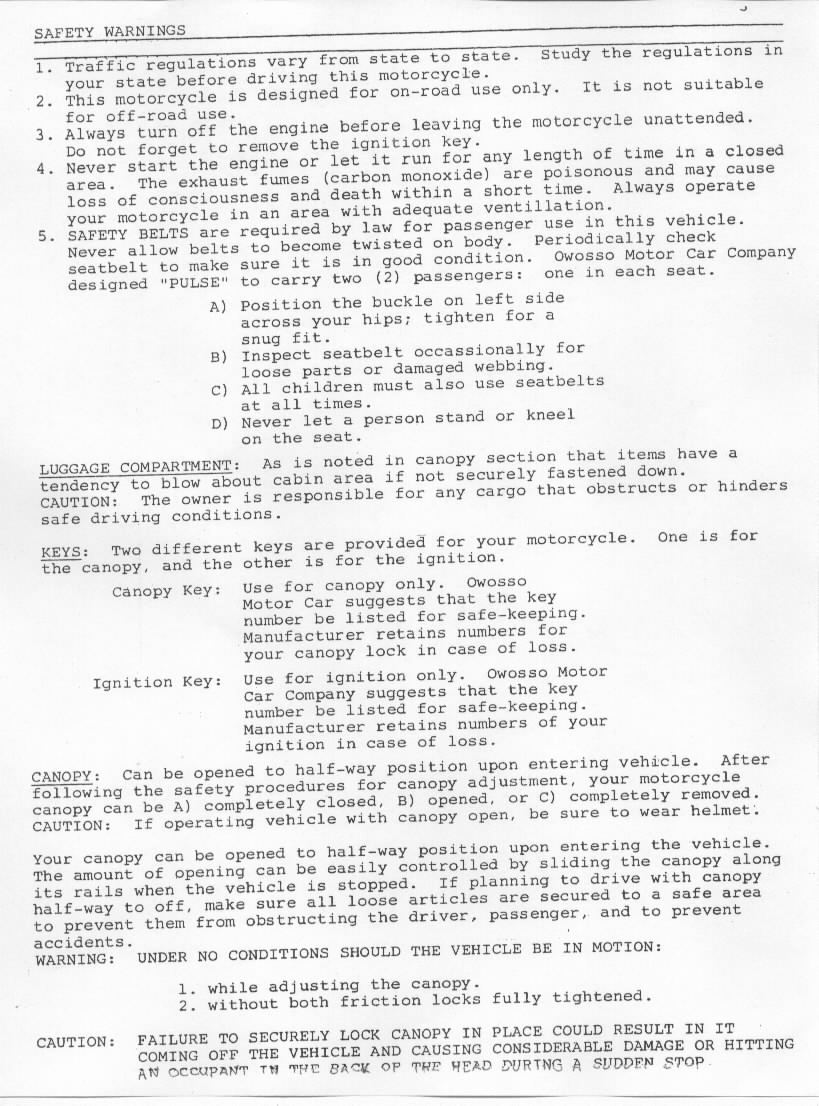
SAFETY WARNINGS
2. This motorcycle is designed for on-road use only. It is not suitable for offroad use.
3. Always turn off the engine before leaving the motorcycle unattended. Do not forget to remove the ignition key.
4. Never start the engine or let it run for any length of time in a closed area. The exhaust fumes (carbon monoxide) are poisonous and may cause loss of consciousness and death within a short time. Always operate your motorcycle in an area with adequate ventilation.
5. SAFETY BELTS are required by law for passenger use in this vehicle. Never allow belts to become twisted on body. Periodically check seatbelt to make sure it is in good condition. Owosso Motor Car Company designed PULSE to carry two (2) passengers: one in each seat.
A) Position the buckle on left side across your hips; tighten for a snug fit.
B) Inspect seatbelt occasionally for loose parts or damaged webbing.
C) All children must also use seatbelts at all times.
D) Never let a person stand or kneel on the seat.
LUGGAGE COMPARTMENT: It is noted in the canopy section that items have a tendency to blow about cabin area if not securely fastened down. CAUTION: The owner is responsible for any cargo that obstructs or hinders safe driving conditions.
KEYS: Two different keys are provided for your motorcycle. One is for the canopy, and the other is for the ignition. Canopy Key: Use for canopy only. Owosso Motor Car suggests that the key number be listed for safe-keeping. Manufacturer retains numbers for your canopy lock in case of loss.
Ignition Key: Use for ignition only. Owosso Motor Car Company suggests that the key number be listed for safe-keeping. Manufacturer retains numbers of your ignition in case of loss.
CANOPY: Can be opened to half-way position upon entering vehicle. After following the safety procedures for canopy adjustment, your motorcycle canopy can be A) completely closed, B) opened, or C) completely removed.
CAUTION: If operating vehicle with canopy open:
Your canopy can be opened to halfway position upon entering the vehicle. The amount of opening can be easily controlled by sliding the canopy along its rails when the vehicle is stopped. If planning to drive with canopy halfway to off, make sure all loose articles are secured to a safe area to prevent them from obstructing the driver, passenger, and to prevent accidents.
WARNING: UNDER NO CONDITIONS SHOULD THE VEHICLE BE IN MOTION:
1. while adjusting the canopy.
2. without both friction locks fully tightened.
CAUTION: FAILURE TO SECURELY LOCK CANOPY IN PLACE COULD RESULT IN IT COMING OFF THE VEHICLE AND CAUSING CONSIDERABLE DAMAGE OR HITTING AN OCCUPANT IN THE BACK OF THE HEAD DURING A SUDDEN STOP.
CONTROLS AND INSTRUMENT PANEL
Note: Previous owners of your Pulse may have altered engine, controls, dash gauges, etc. The following MAY NOT pertain precisely to your vehicle. Generally speaking, the gauges in your Pulse probably came from the donor motorcycle.
HEADLIGHT SWITCH:
Located left side of dash. Narrow button. Push on upper half for on. Lower half
for off. Hi-beam is a separate button to the right of ON
switch. Push on upper half for hi. Lower half for lo. Blue indicator light on tachometer gauge will
indicate hi-beam when on.
WINDSHIELD WIPERS:
The button is located on the right side of dash and is on when pushed on the upper
half of button, and off when pushed on the lower half.
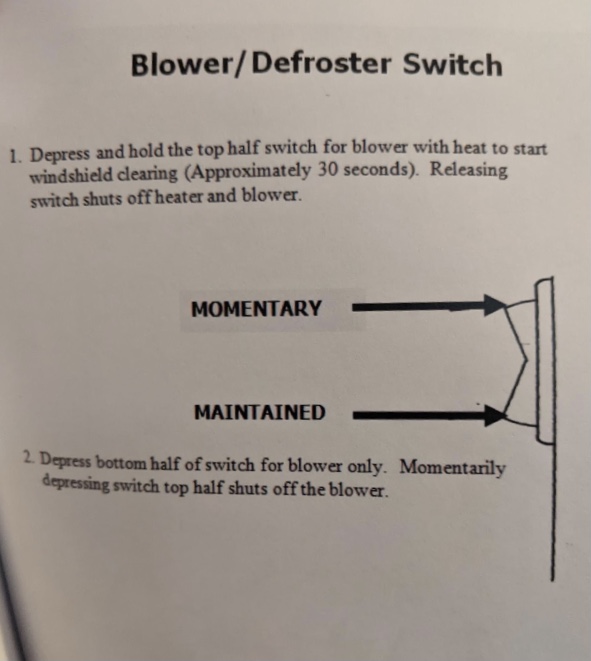
DEFROSTER AND VENTILATING FAN:
Located on the right side of dash and the right side of windshield
wiper button. Depress upper half to turn on and lower half to turn off.
DIRECTIONAL TURN SIGNALS:
Located on left side of dash. Push to the left for left directional.
Push to the right for right directional. Turn indicator is selfcanceling. If the
switch is not cancelled by hand (by pushing button in), it will self-cancel after the
machine has traveled about 10 seconds or approximately 150 meters (490 feet), which ever is
greater. It will not selfcancel while stopped at an intersection.
SPEEDOMETER:
Located on the left side of the dash and indicates the speed of motorcycle in miles per hour.
ODOMETER:
Located in the speedometer. Set and reset by turning knob behind the instrument panel.
TACHOMETER:
Located on right side of dash. The tachometer is provided so the driver can keep the
engine revolutions within the ideal power range of 4,000 to 6,000 RPM.
DO NOT OPERATE IN THE RED ZONE--RED ZONE IS 9,000 RPM AND ABOVE.
FUEL GUAGE:
Left side of dash, below the speedometer. It indicates level of fuel in tank. It is
on only when the ignition is on.
VOLTMETER:
Right side of dash, below tachometer. The voltmeter has the advantage of providing a
warning of battery problems. If meter reads 1 12, this indicates an excess draw from battery.
Allow to recharge while running or it requires immediate attention.
NOTE: Color code of red and green lights vary with your engine choice. Hondas are different than Yamaha or Kawasaki. Neutral light should be green.
GASOLINE:
Depends on your engine choice. Contact your local motorcycle shop.
DRIVING SITUATIONS:
The PULSE is a new concept in motorcycles. You will find it to be a pleasure
in all forms of weather. Due to the design and the single placement of the driver, the outrigger is a
feature designed to insure maximum stability.
1. Since the outriggers are not visible when the driver is looking forward, you must train yourself to be completely aware of the 24 (two foot) extension of the outriggers on both sides. Clearances of obstacles, oncoming traffic and ongoing traffic with your motorcycle are your responsibility.
Also, parallel parking, angle parking and tight maneuvers should be made with outriggers in mind.
2. The nose (front end) of the PULSE CAN NOT be seen from the drivers position. You must learn to judge distance accordingly.
CAUTION: DUE TO THE UNIQUE DESIGN OF THIS MOTORCYCLE, IT IS STRONGLY SUGGESTED BY THE MANUFACTURER THAT YOU BECOME ACCUSTOMED TO ITS MANUVERABILITY AND DRIVING CAPABILITIES BEFORE ENTERING INTO A HEAVY TRAFFIC AREA OR A STRANGE AREA TO THE DRIVER.
Be sure you know how to use your motorcycle and its features before operating it.
Before entering your motorcycle:
1. Check the windshield, canopy and light lens for obstructions and visibility.
2. Inspect tires for their appearance and condition. Check tire pressure for proper inflation.
3. Look for fluid leaks.
4. Check chain tension and condition.
5. Check all chassis fittings and fasteners, upper aft, lower aft, outrigger covers.
6. Check operations of clutch, its condition and free play: adjust if necessary.
7. Check engine oil level and battery fluid level; add correct fluids, if necessary.
8. Check to be sure area around the motorcycle is clear.
9. for tire pressure
ENTERING YOUR PULSE MOTORCYCLE
1. Unlock canopy and slide back using the canopy handle.
2. Passenger enters by flipping front seat forward and stepping onto black non-skid material on the outrigger; the other leg proceeding to enter vehicle by placing foot on the center frame tube, behind the front seat. Lower oneself and place each leg to the outside of the front seat.
3. The driver enters by putting front seat to correct position. Place one foot on the black non-skid material on the outrigger, with the other leg proceeding to the outrigger frame within the body cavity Lower body down by using the support of the canopy rails.
4. The passenger then places feet to either side of the front seat, resting them on the outrigger support bar.
5. To adjust the seat position, use the control lever at the front of the seat. Pull the lever towards the left and exert body pressure to move the seat forward or backward. Release lever to lock into position. Be able to comfortably reach pedals and steering wheel.
6. Secure canopy knobs to position desired for driving. Tighten knob on left clockwise as well as the right clockwise.
CAUTION: Make sure the canopy knobs (friction locks) are tightened securely
7. Adjust both outside mirrors, making sure visibility to the side and rear of the motorcycle clear and comfortable.
CAUTION: Adjusting both outside mirrors is the ONLY MEANS OF VIEWING THE SIDE AREA AND THE REAR WHILE IN MOTION. USE THE MIRRORS TO THEIR MAXIMUM POTENTIAL. YOUR SAFETY IS YOUR RESPONSIBILITY.
8. WARNING: OMCC PULSE is designed to carry two passengers: one in each seat.
9. Check the operation of lights, switches, horn and brakes.
10. Check all gauges including fuel gauge.
11. CAUTION: Never start your engine or let it run for any length of time in a closed area. Exhaust gas contains carbon monoxide, which by itself has no color or odor, a dangerous gas. It can cause unconsciousness and can be lethal. If at any time you think exhaust fumes are entering the motorcycle, have the cause determined and corrected as soon as possible. If you must drive under these conditions, drive only with the canopy half-way open, giving occupants a continuous flow of fresh air.
STARTING AND OPERATION.................
HAVE YOU ADJUSTED MIRRORS?
ADJUSTED AND LOCKED CANOPY?
ADJUSTED SEATS?
FASTENED SEATBELTS?
STARTING AND WARMING UP A COLD ENGINE....Check your Engine Manual
1. Turn the ignition key to the "on" position.
2. Shift transmission into neutral by depressing clutch and using shift lever.
3. Pull the carburetor starter knob (choke) fully toward you.
4. Start the engine. Turn key to nearly 3 o'clock and quickly turn over. You might have to depress clutch....check your engine manual. It may be necessary to lightly depress accelerator pedal before turning key.
5. Leave choke out for two or three minutes. Let engine idle before shifting.
START OUT AND ACCELERATE
1. Push in on clutch pedal to disengage the clutch.
2. To start the vehicle moving, depress the clutch fully and engage first gear by pulling lever on the right back to first position.
3. Release clutch pedal slowly while gradually depressing the accelerator.
4. Accelerate until the vehicle attains enough speed to upshift to second gear. Follow the same steps you did in engaging the first gear.
5. Shift up to the higher gears as required in the same manner. Refer to chart showing RPMs and MPH that are suggested by manufacturer.
CAUTION
A) When you are shifting from one gear to another, be certain to depress clutch pedal all the way to the floor to avoid crunching or chipping gears.
B) Do riot use the clutch pedal as a foot rest between gear changes as this may result in clutch damage.
C) Never hold the vehicle in position on a steep bill by slipping the clutch.
D) To maintain safe speeds on steep down grades and to help save the brakes, shift to a lower gear before you start down.
E) When quick acceleration is required, shift to a lower gear and accelerate until the vehicle reaches the maximum speed in each gear. Do not exceed the speed limit of any gear.
PARKING: Before leaving your motorcycle.... NOTE.....Most Pulses do not have a parking brake.
1) make sure that it is placed in first gear to prevent the vehicle from rolling.
2) If parking uphill, place vehicle with front end outward in space with wheel turned to the left.
3) If parking downhill, place vehicle with front end toward the inside of the space with wheel turned to the right.
CAUTION: IN ALL CASES WHEN PARKING:
A) Shift into 1st gear.
B) Remove ignition key.
C) Lock the canopy.
STOPPING:
Release the accelerator pedal and press down the brake pedal. Just before the car stops, press down the clutch pedal while continuing to apply the brake, and move the gear shift lever to neutral. Neutral is to be used when starting or idling the vehicle.
NOTE: REALIZE that because it is a motorcycle engine, while shifting forward or backwards the shifter knob should be released so it can come back to the center position.
IT IS IMPORTANT THAT BETWEEN EACH SHIFT, THE LEVER IS BROUGHT BACK TO CENTRAL POSITION.
CAUTION: When approaching corner or slowing down for any reason, it should be down shifted only until reaching a low enough gear to ensure continuance or pick up speed to resume course without excessive lugging of engine.
WARNING: AVOID EXCESSIVE LUGGING OF ENGINE WILL CAUSE OVERHEATING AND RESULT IN ENGINE STOPPAGE AND/OR ENGINE DAMAGE.
Use caution when accelerating or when shifting into a lower gear on slippery surfaces. Sudden acceleration or downshifting could cause the wheels to skid and result in loss of control.
DOWNSHIFTING: To keep the engine running smoothly or to maintain satisfactory performance, you must downshift. Example: turning corners, stopping for a traffic signal, traffic sign, situation in the road that requires slower speed, descend or ascend on hilly or mountainous terrain. ALWAYS DOWNSHIFT TO MAINTAIN PROPER ENGINE RPM.
BUY A SERVICE MANUAL FOR YOUR ENGINE.
If the owner is not familiar with motorcycle service ........this work should be done by a qualified motorcycle mechanic.
CAUTION: As with any machine, take precaution when making any check, performing any maintenance, or any repair to avoid being injured. Improper or incomplete service could also lead to the vehicle working improperly, which may result in personal injury or damage to the motorcycle. If you have any questions about performing some service, have the work done by a qualified motorcycle mechanic.
CONSULT YOUR ENGINE MANUAL IN REGARDS TO CLEANING AIR FILTER, OIL CHANGES, CHAIN ADJUSTMENTS, TUNE-UPS ETC.
THE BATTERY IS LOCATED EITHER IN FRONT OF THE FRONT WHEEL (accessable thru the front wheel well)
OR
BY THE ENGINE in the rear of the Pulse.
You may charge or jump the battery by connecting the negative wire to the engine frame and the positive wire to the POSITIVE BATTERY TERMINAL located on chassis inside the small door in back of passenger seat on left side of vehicle by outrigger.
CAUTION: DO NOT CONNECT THE POSITIVE LEAD TO THE NEGATIVE TERMINAL OR VICEVERSA. DOING SO COULD CAUSE DAMAGE TO BOTH CHARGING SYSTEMS OR COULD RESULT IN SERIOUS PERSONAL INJURY.
BRAKE FLUID RESERVOIR is located under the front dash on right side. The reservoir inspection should be made only by an authorized mechanic.
BRAKES
Both the front and rear brakes are hydraulic disc types. As the brake pads wear, brake fluid level
drops, automatically compensating for wear. There are no adjustments
to perform, but fluid level and pad wear must be inspected periodically. They system must be inspect
every 300 miles to ensure there are no fluid leaks.
CAUTION: If the brake pedal free-play exceeds 1 and the brake pads are worn beyond the recommended limit, there is probably air in the system, and it must be bled.
DRIVE CHAIN..........Yamaha
NOTE: The drive chain is reached by removing the lower rear body pan The service life of the chain is dependent upon lubrication and adjustment. Poor maintenance can cause premature wear or damage to the drive chain and sprockets. The drive chain should be checked and lubricated as follows:
1. Lubrication is recommended every 300 miles. Best time is when chain is warm--immediately after driving.
2. Brush away loose dirt.
3. Use kerosene (paraffin oil) for washing chain; never use steam, thinner or -such- volatile solvents as gasoline and benzene. Then generously lubricate with a motor oil like SAE 80-90. It is possible to use one of the leading brands of spray-type chain lubricants which are recommended for 0-ring chains. These lubricants should have the properties which, after initial application, thicken to a higher viscosity than previously stated.
4. Chain should be replaced when the amount of stretch exceeds one percent of its original length.
5. In the case where even one Seal-Ring is missing or damaged, the entire chain length should be replaced.
ADJUSTMENT:
1. Turn engine off and place transmission in NEUTRAL.
2. Check slack midway between the sprockets. It should be between .5 to .75 of vertical movement.
3. Roll vehicle and check drive chain slack in different locations. It should remain constant. If the chain is slack in one position and taut in another, some links are kinked and binding. This may be eliminated by lubrication. If not, replace chain.
REPLACE CHAIN:
1. Remove cotter pins and loosen rear axle nuts.
2. Loosen rear caliper bracket bolts at swing arm.
3. Loosen adjusting bolt lock nuts (4)
4. Turn the adjusting bolts equally on both the right and left chain adjuster to increase or decrease chain slack.
5. Make sure the length of the protruding portion of the adjustment bolt is the same on each side.
NOTE: If chain slack is excessive when the rear axle is moved to its furthest rearward limit of adjustment, the chain is worn and must be replaced.
6. Tighten the rear axle nuts (rear axle nut torque: 51-72 ft./lb.).
7. Replace axle nut cotter pins (2)
CAUTION: Replace with new cotter pins.
8. Tighten the left adjusting bolt lock nuts.
9. Tighten the right adjusting bolt lock nuts.
10. Recheck for amount of drive chain slack.
11. Replace the rear body panel.
ELECTRICAL
The PULSE generating system (alternator) supplies the electrical needs of the motorcycle.
The PULSE requires proper battery management to insure power generating ability. It is suggested to turn engine fan off if in use over a six mile stretch or longer. If you encounter a situation on which the electrical load causes the voltage to drop below 11 volts, selectively turn off accessories until the voltage increases. Suggestion is to turn off engine fan and charge up battery by traveling a distance of six miles at normal highway speeds of 50-55 mph.
CAUTION: PROLONGED OPERATION BELOW 12 VOLTS CAN DRAIN THE BATTERY.
FUEL CAP
The fuel cap is behind a hinged door located on the top of the upper aft. If you need to replace the fuel cap, use only a cap specified for your model. An incorrect cap can result in malfunction of the fuel system or possible damage to vehicle or injury to occupant or passerby. You can g a correct replacement cap from your Owosso Motor Car dealer.
FUSES
The fuse compartment is located on the left side of the front neck post (under the dash).
If you are the second or third owner......this might not be applicable)
The specified fuses are:
30A Main (battery)--orange and red wires
10A Lights--light blue wire
20A Ignition wire
10A Wiper Motor--brown wire
20A Blower--Orange wire
10A Radio & Engine Fan--red wire
NOTE: When frequent fuse failure occurs, it usually indicates a short circuit or an electrical overload. See an Owosso Motor Car dealer or qualified motorcycle mechanic for repair.
1. Turn the ignition key to its off position before checking or replacing fuses to prevent accidental short circuiting.
2. Pull the old fuse out of the clips, or slide it lengthwise unti1 one end comes out. Lift it out with your fingers.
3. Push the new fuse, with the same rating as the one removed, into the clips.
WARNING:
NEVER USE A FUSE WITH A DIFFERENT RATING FROM THAT SPECIFIED. SERIOUS DAMAGE TO THE ELECTRICAL SYSTEM OR FIRE MAY RESULT.
DO NOT PRY THE CLIPS OPEN TO GET A FUSE OUT. YOU COULD BEND THEM, CAUSE POOR CONTACT, AND DAMAGE THE ELECTRICAL SYSTEM IDLE SPEED ADJUSTMENT
The adjustment can be reached through the right engine access door. The idle speed adjustment procedure should only be used when changes in altitude affect normal idling speed. See an Owosso Motor Car dealer or qualified motorcycle mechanic for regularly scheduled carburetor adjustment including individual adjustments and synchronization. With a warm engine the idle speed should be 1,200 + 100 RPM.
OIL LIGHT INDICATOR
If the oil light should come on while driving, immediately pull over to the side of the road (out of traffic), turn the ignition key to its Off position, open the brake doors (just behind NACA scoops, refer to page_) to assist cooling the engine compartment. Wait for about 10 minutes. Check the oil level and add oil if necessary. Restart the engine to see if the light comes on. If it does, with sufficient engine oil, consult your Owosso Motor Car dealer or other qualified motorcycle mechanic.
CAUTION: DRIVING WITH THE OIL LIGHT ON MAY CAUSE PERMANENT DAMAGE TO THE ENGINE.
OIL CHANGE
The oil can be changed from underneath the PULSE without removing any body panels. Engine oil quality is the chief factor effecting engine service life. Change oil every 2,500 miles and use:
SAE 20/40 SE 60F and below
SAE 20/50 SE 60F and above
1. After engine has reached normal operating temperatures, remove the oil filter cap.
2. Place an oil drain pan under the crankcase. Remove oil drain plug.
3. Clean threads on the drain plug and crankcase cover to remove any dirt or chips.
4. Replace drain plug.
5. Fill with oil until the level is between the two marks on window (beneath oil intake)
6. Replace filler cap.
7. Start engine and let it idle for a few minutes.
8. Stop engine and make sure oil level is still between the two marks on window.
OIL FILTER
The oil filter can be changed from underneath the PULSE without removing any body panels. It is located in the front and bottom of engine.
Change the oil filter each time the engine oil is changed.
1. Remove the oil filter bolt and pull the filter element out of the filter cover.
2. Insert a new oil filter element. Make sure that 0-rings are in good condition and positioned properly.
3. Tighten the oil filter cover bolt to torque of 20-33 ft. lb.
After replacement of the engine oil, and/or oil filter, check the oil pressure and oil leakage. The oil pressure indicator light should go off after the engine is started.
CAUTION: IF THE INDICATOR LIGHT FLICKERS OR REMAINS ON, IMMEDIATELY STOP THE ENGINE AND CONSULT YOUR OWOSSO MOTOR CAR DEALER OR OTHER QUALIFIED MECHANIC.
OUTRIGGER ADJUSTMENT
To operate your vehicle, at least one outrigger wheel should clear the ground when the motorcycle is sitting at a level position and is carrying a desired load. This is done by loosening lock nut at end of strut rod nearest outrigger wheel underneath vehicle. Turn rod until outrigger wheel is in desired position while vehicle is level from side to side.
Repeat opposite side of vehicle.
REPLACEMENT FASTENERS
During vehicle maintenance, any fasteners used to replace older ones must have the same measurements and strength as those removed, whether metric or customary. (Numbers or radial lines will show strength markings; they should never be replaced by substitute of a differing quality.) Where possible, fasteners taken from the motorcycle should be saved for reuse in the same spot. When the fastener can not be reused, special care should be used to replace it correctly and a match with the old one. For information and help, see the website reagrding fasteners.
TIRES
Tire Pressure Specifications are on tires. Tire pressure and air shock air adjustments will determine the quality of the ride and handleing of the Pulse.
FLAT TIRE
FRONT TIRE........PLACE JACK a few inches BEHIND FRONT WHEEL under FIBERGLASS BODY. PLACE CLOTH TOWEL OVER WOOD SUPPORT (2 X 4)
REAR TIRE.........PLACE JACK ON ENGINE FRAME IN FRONT OF REAR TIRE
Changing or fixing a flat tire on the PULSE is more difficult than on a car, consequently, other approaches may be preferred such as:
1. Prevention--certainly it is not possible to avoid running over nails and other debris which can puncture tires; however, it is possible to prevent or minimize the loss of air once the tire is punctured. This is accomplished by putting a measured, amount of a liquid tire sealant into the tire. There are many different liquid tire sealant products on the market, but the best is one that does not dry out or ball up, is guaranteed for the life of the tire, and assists in cooling and balancing the tire. Liquid tire sealants do a good job in self-sealing if the tire is punctured by a ? diameter or smaller object. They will not prevent a catastrophic blow-out nor seal a shredded tire.
2. On the spot repair. Determine what caused the puncture. If it is ? in diameter or less, remove the culprit and plug the tire. Next, roll the PULSE until the valve stem of the flat tire is between either the 4:30 to 5 oclock position or between the 7 to 7:30 position. Remove the valve stem and insert the recommended amount of liquid tire sealant into the tire (generally 8 ounces for the driving and steering tires and 4 ounces for each outrigger tire). Replace the valve stem and roll the PULSE back and forth several times so the -sealant can completely wash the entire inside of the tire. Pump the tire up to its recommended pressure.
CAUTION: Tires punctured by objects greater than 1/8 in diameter, even though sealed by a liquid tire sealant, should be examined by a tire expert as soon as practical. The tire may have been materially weakened. Driving on a flat tire may damage the tire and/or rim.
3. The PULSE is a lightweight vehicle and has four tires to maintain balance. It is possible to drive with a flat tire at speeds under 10 mph and distances up to three miles to the nearest service station or garage.
4. Call a qualified motorcycle mechanic who should provide a scissors jack, tire patching kit and compressed air. He will be familiar with setting chain tension, wheel alignment, brake adjustments, etc.
5. To change the tire yourself, you will need a scissors jack, a wedge, and a couple blocks of wood.
A) After turning engine off and insuring vehicle has been placed on solid ground, preferably dry pavement, jack vehicle up.
B) If the back tire is not flat, set the parking brake or put in gear.
C) Place wedges as follows: Rear tire flat--wedge under front of front tire. Front tire flat--wedge under rear of back tire.
WHEEL REMOVAL
CAUTION: IT IS ADVISABLE TO HAVE A QUALIFIED MECHANIC MAKE THIS REMOVAL AND REASSEMBLY.
1. Place the Pulse on the jack.
FRONT TIRE........PLACE JACK a few inches BEHIND FRONT WHEEL under FIBERGLASS BODY. PLACE CLOTH TOWEL OVER WOOD SUPPORT (2 X 4)
REAR TIRE.........PLACE JACK ON ENGINE FRAME IN FRONT OF REAR TIRE
2. Remove the tension bar and the brake rod from the brake shoe plate. The tension bar can be removed by removing the cotter pin and nut from the tension bar bolt. The brake rod can be removed by removing the adjuster.
3. Disconnect the drive chain.
4. Loosen the chain tension adjusting nuts and bolts on both sides.
5. Remove the axle nut cotter pin and axle nut. Discard the old pin.
WARNING: ALWAYS USE A NEW COTTER PIN ON THE AXLE NUT.
TOWING
If your PULSE is unable to run under its own power, it can be moved safely ONLY in the following manner:
1. It can be carried on a flat bed trailer. The trailer should be rated for a 1,100 pound load.
2. It can be towed by using a specially designed tow bar which fastens to the PULSE front wheel frame.
These can be made from plans on the website or perhaps you can buy a used one from other Pulse owners.
You can tow the Pulse at highway speeds. JUST BESURE BOLTS ARE TIGHT AND USE SAFETY CHAINS
FOR TOWING, DISCONNECT THE DRIVE CHAIN. NO NEED TO DISCONNECT DRIVE SHAFT.
DRIVE CHAIN/TOWING
The PULSE can not be towed in a conventional manner by lifting either the front or rear end and Pulling the vehicle behind the tow truck. The frame is inaccessible and the bumper is non-existent for lifting and bracing. The wheel locations would not prevent the vehicle from tipping when raised. - The vehicle can not be towed by a rope or chain. Dollies can be placed under all the wheels, but there is no provision for bracing (solid connections that allows the towed vehicle to decelerate by using the towing vehicle brakes) .
Also, the PULSE can not be pushed without the possibility of causing damage. Since there are no bumpers and the body panels are made from fiberglass, pushing can damage the rear lights, exhaust system and rear body panels.
SUGGESTION: Manual pushing can be best used by placing hand by front window frame.
WASHING PULSE
BODY
The PULSE body is made of quality-formed fiberglass which is impervious to rust and corrosion. One should also keep in mind the care and attention fiberglass requires. When placed. under abnormal abuse, a common characteristic known as star fractures may occur on the surface. It can be corrected at a qualified body shop.
EXTERIOR FINISH: The paint finish on your PULSE provides beauty, depth of color, gloss retention and durability. CHECK WITH AUTOMOTIVE SHOP FOR BEST FIBERGLASS CLEANERS AND WAXES.
CANOPY
CHECK WITH A MOTORCYCLE SHOP FOR BEST CLEANERS FOR THE PLASTIC CANOPY.....similar to motor cycle windshields.
SPECIFICATIONS
These specifications are given here for information only.
REPLACEMENT PARTS: Print off the Replacement part numbers listed on the internet website.
SPECIFICATIONS
Dimensions Overall length..................162"
Overall width....................62"
Overall height...................42"
Wheelbase.........................123"
Minimum ground clearance..............7"
Weight..............................1000 lbs
Chassis
Frame...........................welded tubular steel
Suspension:
front/rear..........................swing arm
outrigger..........................compression spring
Brakes...............................front/rear ........Hydraulic disc
Fuel Tank............................3 to 10 gallons
Twin Early Style Headlights....................12V, 35W/45W GE# 4000
Later Single Pop-up Style Headlight from a 1984 Pontiac Fiero
Tail/Brake..................................12V, 7.5W/26W, Stanley #1157NA
WIRING HOOKUPS
GAUGES
Generally these gauges are the ones from the donor motorcycle.
If you have a Yamaha engine then consult the motorcycle manual.
If you have the Honda Goldwing engine, then consult a Goldwing manual.
Visit the Pulse Factory
at Owosso, MI
VIN Numbers
and Paint Codes
Your Host, Steve Schmidt

Last Update: 10-20-20......
This is a personal
website and is not affiliated with the
designer, manufacturer or any company officials/employees.
Disclaimer:
Litestar Pulse Website is provided to you free of charge, "as is."
The best efforts to maintain accurate Litestar Pulse
Website history, information, repair tips and content, however, it is
not responsible for the content of its information, opinion providers.
You should not assume that Litestar Pulse Website is error-free and
makes no guaranties as to the accuracy, currency, content, or quality
of any such information.
Copyright 2020 © All rights reserved